
How to Setup a MongoDB Replica Set with Coolify
Antonio Gioia, 2024

This guide will walk you through the process of creating a MongoDB replica set using Coolify, an open-source, self-hostable platform alternative to Heroku / Netlify / Vercel. Coolify simplifies the deployment and management of applications, offering features such as deployment automation, resource management, reverse proxy setup, and automated SSL certificate handling.
What is a Replica Set?
A MongoDB replica set is a group of MongoDB servers that maintain identical data sets. This configuration provides high availability, data redundancy, and improved read scalability. In a replica set, one node acts as the primary, handling all write operations, while secondary nodes replicate the primary’s data.
Prerequisites
- Basic knowledge of MongoDB and Linux commands
- A VPS or a dedicated server
- SSH access to the server
How to Setup the Replica Set
First, create or obtain a VPS, set up the keys, and SSH into it. If you’re unsure how to do this, read my article How to Configure Your VPS with Security in Mind.
Install Coolify
You can deploy Coolify on your server with a single command, as explained in their official documentation:
curl -fsSL https://cdn.coollabs.io/coolify/install.sh | bashRun it as root. If you created a user (which you should) and SSH’d into the server with it, use:
sudo suThen run the install command.
At the end of the installation process, you’ll get the address where Coolify is running. Assuming our server IP is 123.123.123.123, the URL will look like:
http://123.123.123.123:8000 (remember to enable TCP port 8000 on your firewall).
Open the URL in your browser, go through the onboarding process (create an admin account, choose Localhost as the instance), and you’ll reach the Coolify web interface.
If you own a domain and want to get rid of the :8000 in the URL and use https instead of http, you can point a subdomain to this server. Go to your domain provider and add an A record to your DNS records:

This will point cluster.mydomain.com to our server IP. Let’s set up Coolify to handle this record. Go to Settings and edit as shown in the following image:
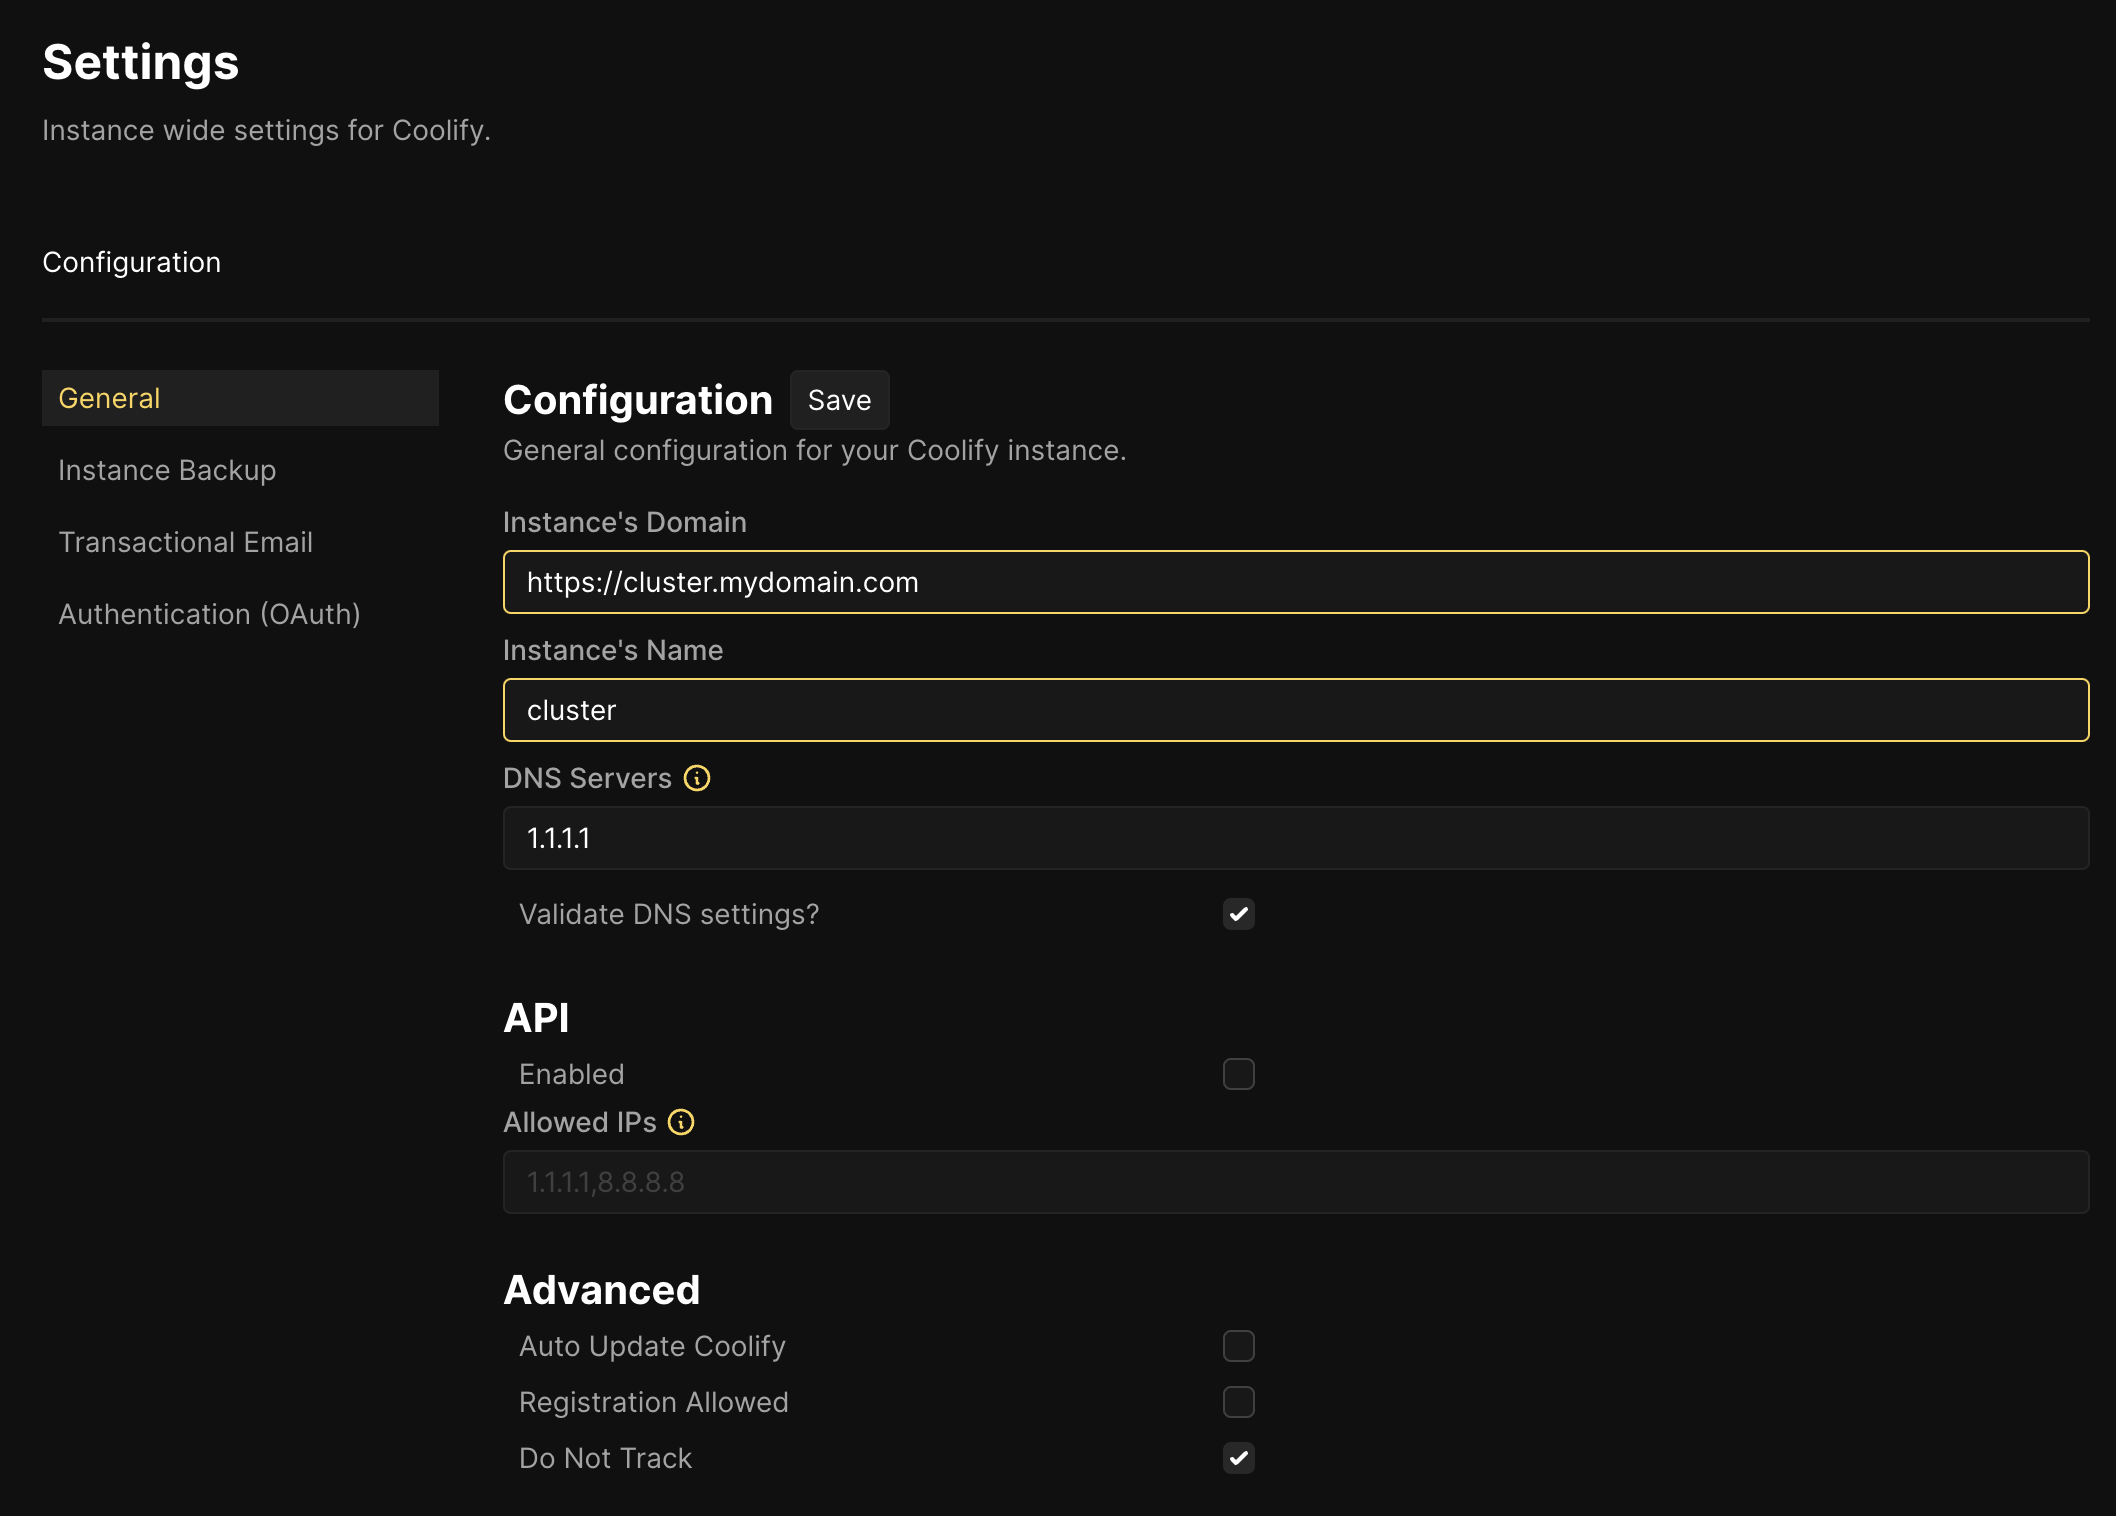
In the Advanced options, I disabled API and Auto Update, and enabled Do not Track. Set up your instance as needed for your project.
Save the settings and wait a few minutes for DNS propagation. You should now be able to access Coolify by going to https://cluster.mydomain.com. If you get SSL errors, try restarting the Proxy Server in Servers / localhost.
When your domain is successfully enabled, remember to disable port 8000 on your firewall.
We can now build our MongoDB replica set.
Create Database Instances
Click on Projects on the left. You should see a button labeled “My first project”. Click on Settings next to it and set a name for the project; I’ll call it Cluster.
Click on Cluster, choose an environment such as Production, and click on + New to add a new Resource.
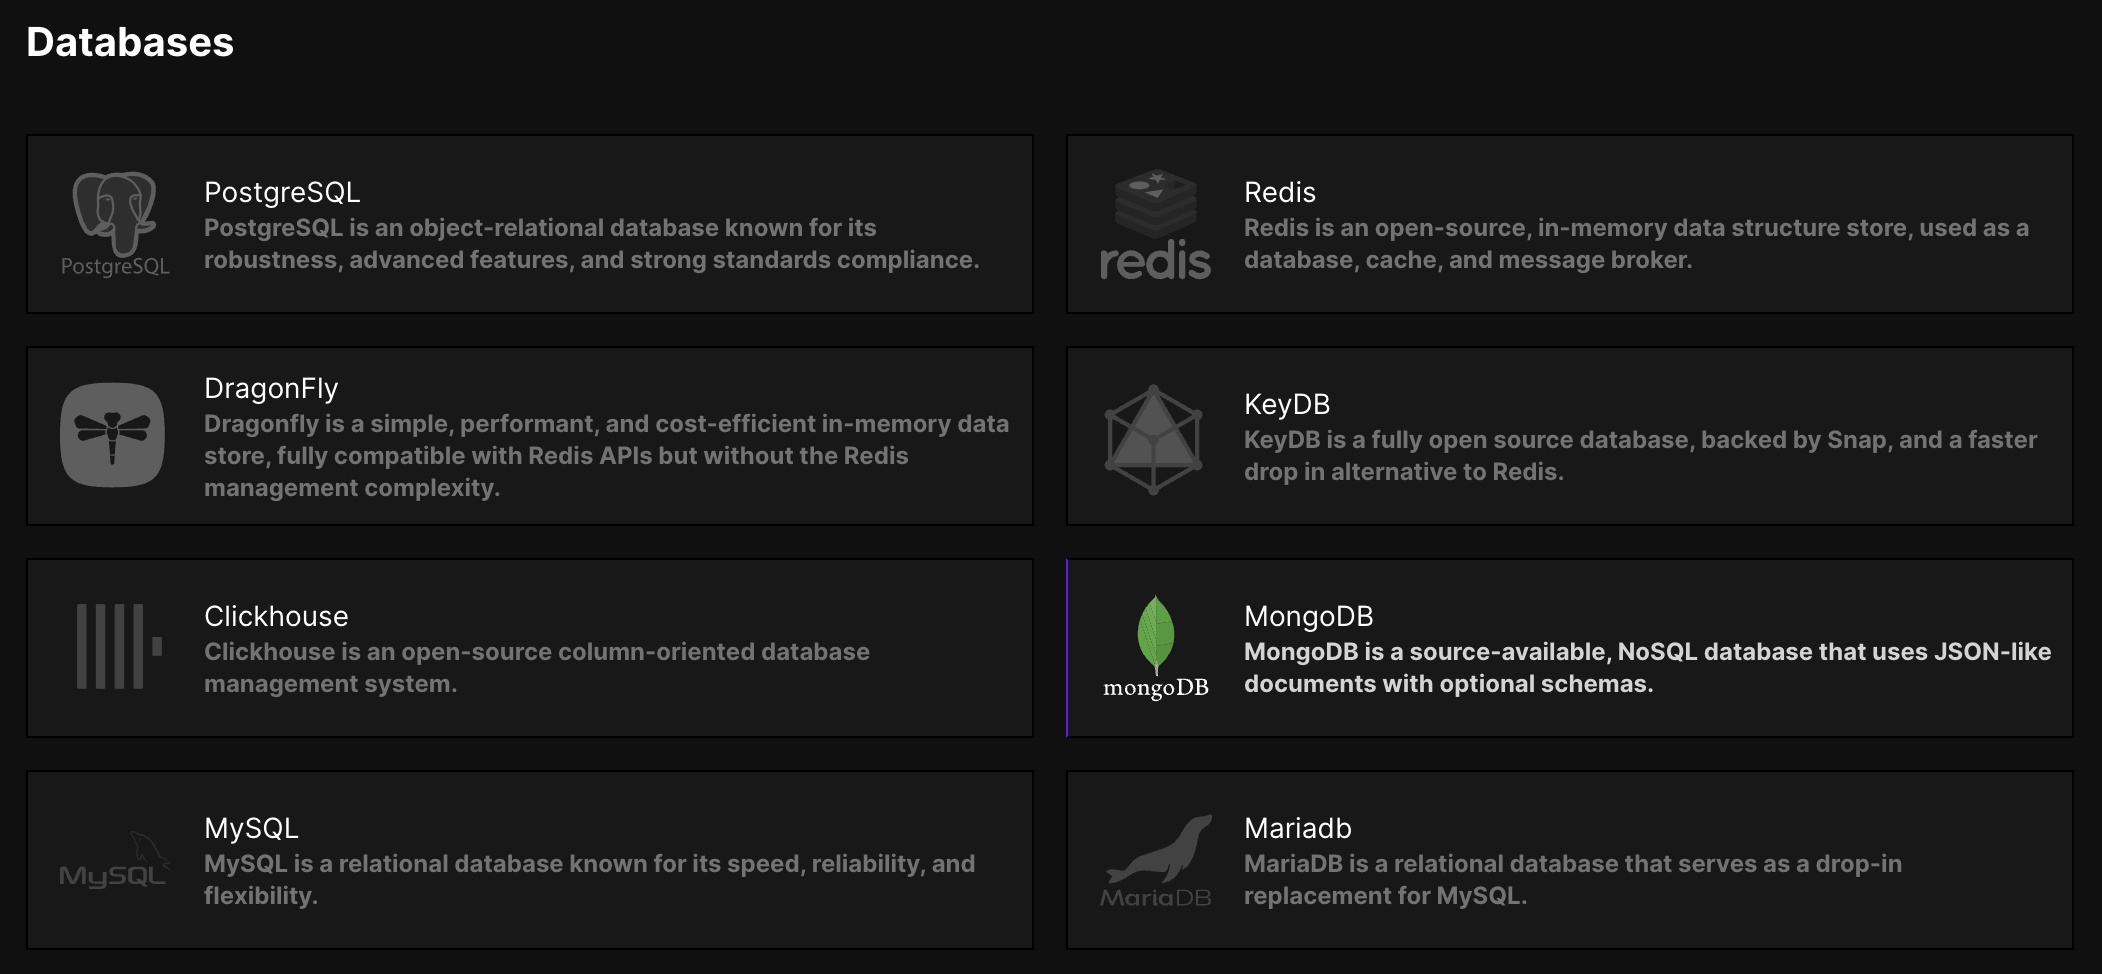
For a replica set, we need to create at least 3 MongoDB database instances.
To create a database instance, after clicking on + New, select MongoDB from the list:
Configure the database, setting a name like repl-1:
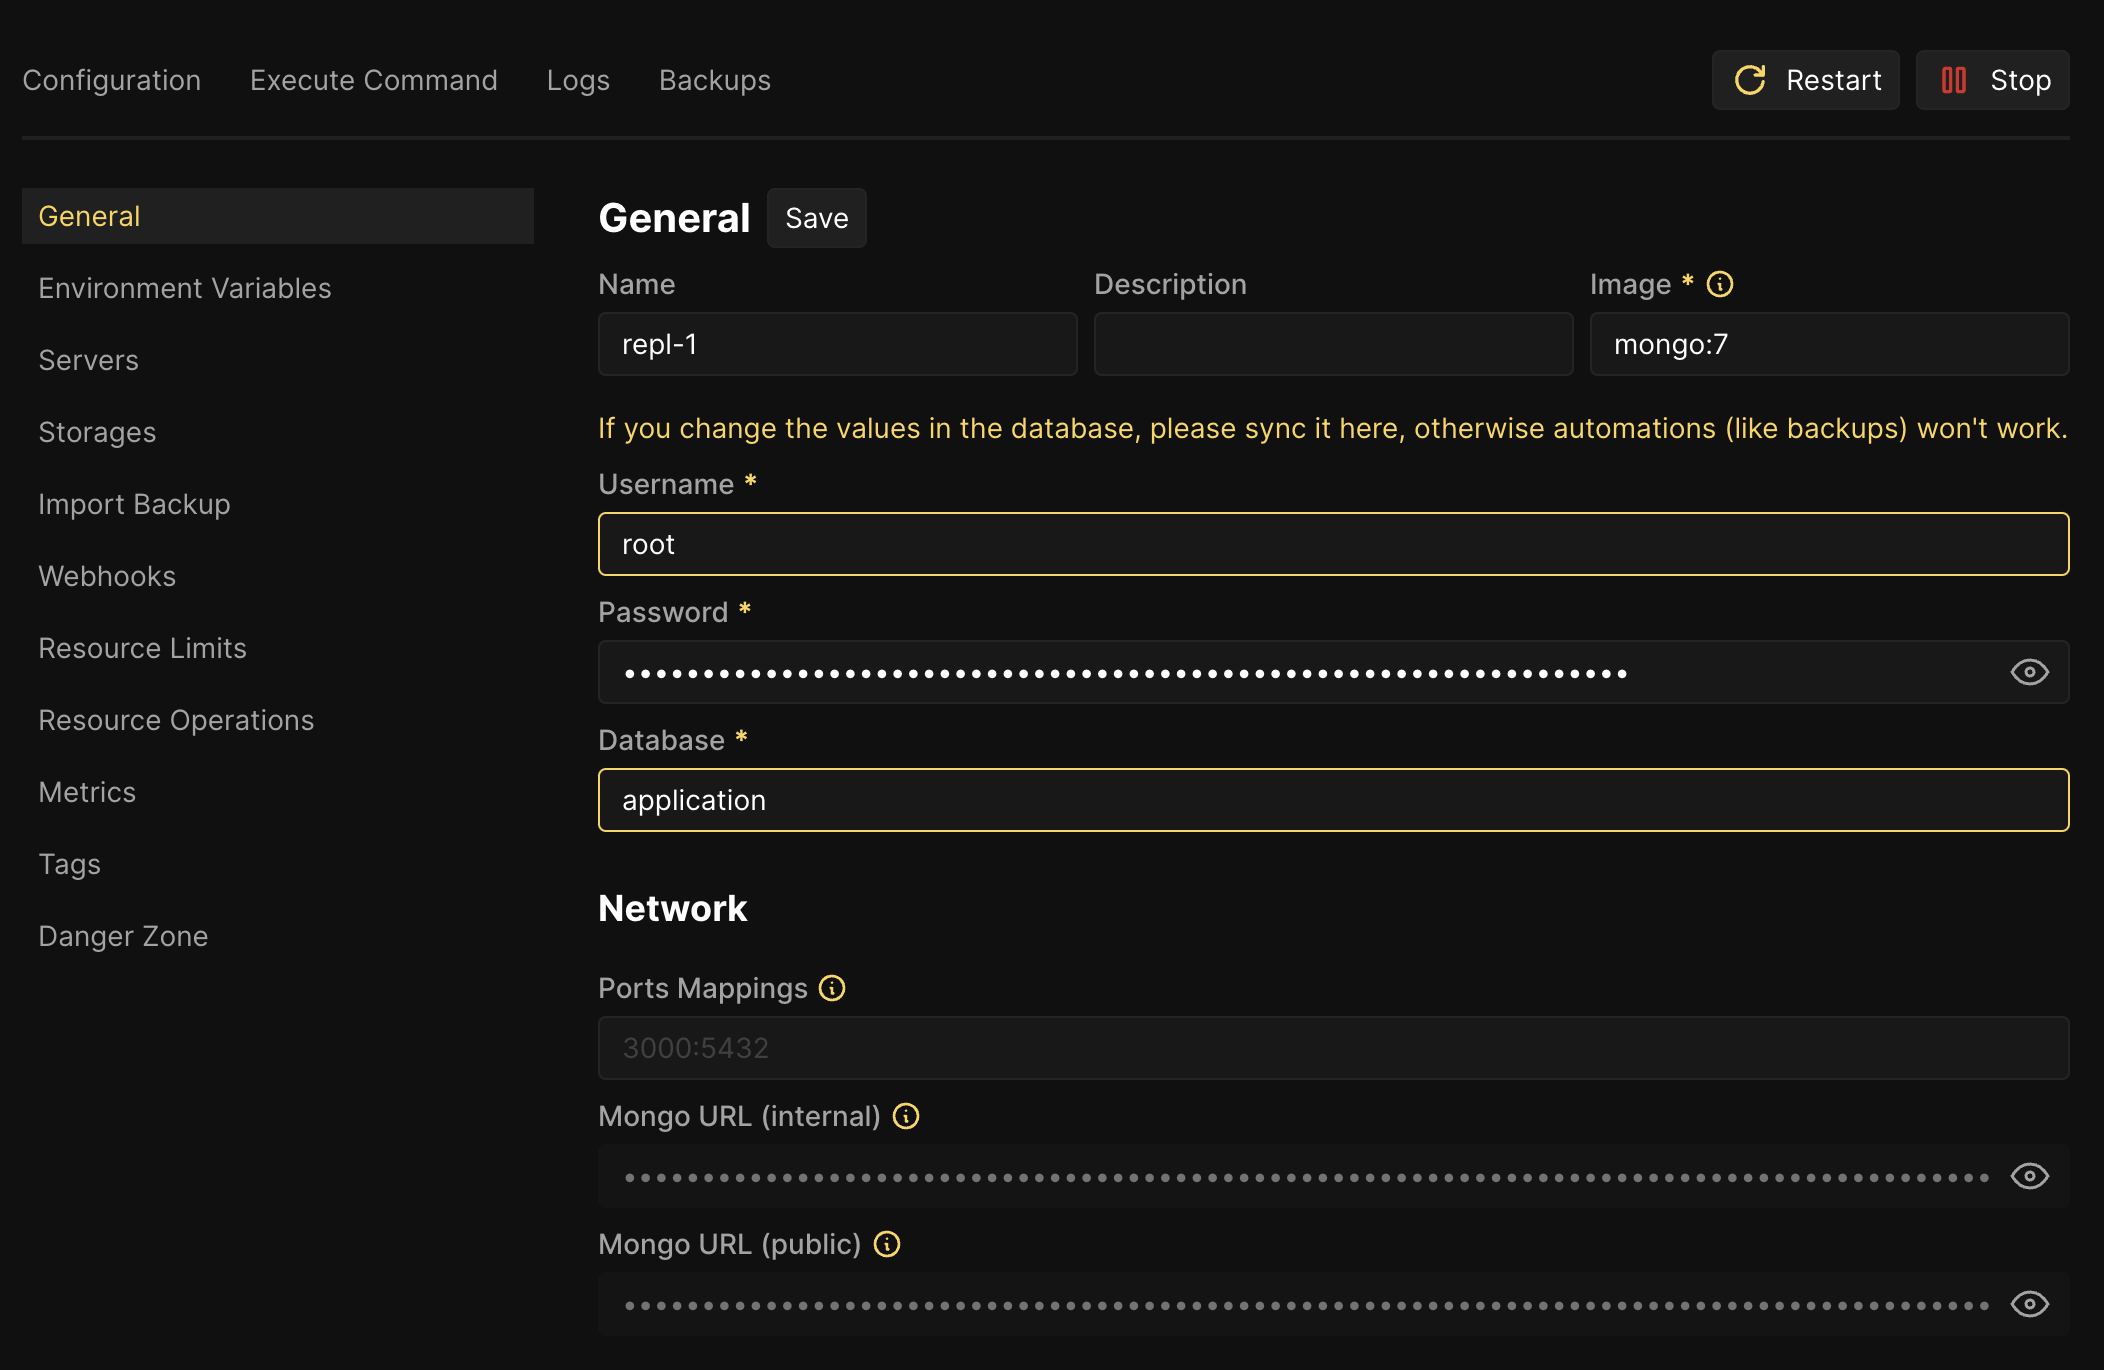
In the proxy section, set a public port (for example 5432) and make it publicly available:

Pick a different port for each database, for example: 5432, 5433, and 5434. Remember to enable these ports on the firewall.
Repeat this step two more times. You’ll end up with 3 databases:

Prepare the Key
SSH into your server and run the following commands:
mkdir replica
cd replica
openssl rand -base64 756 > replica.key
chmod 400 replica.key
sudo chown 999:999 replica.key
Assuming the user you created on the server is called myusername, this creates a directory for the replica set in /home/myusername/replica, generates a key file, and sets the appropriate permissions.
This key will be passed to each database container by adding storage to our instances and applying a custom configuration to each database, as shown in the following steps.
Add Custom Configuration to Databases
On each database’s configuration page, copy and paste the following custom configuration in the Custom MongoDB Configuration text area:
replication:
  replSetName: "rs0"
security:
  authorization: enabled
  keyFile: /tmp/mongodb/replica.key
Remember to click on Save every time you change a configuration. This configuration enables replication, sets the replica set name, and specifies the key file for secure communication between members.
Configure Instance Storage
For each database, on the configuration page, go to Storages, click on + Add to add a volume with the following specifications:
- Volume name:
keyfile - Source path:
/home/myusername/replica - Destination path:
/tmp/mongodb
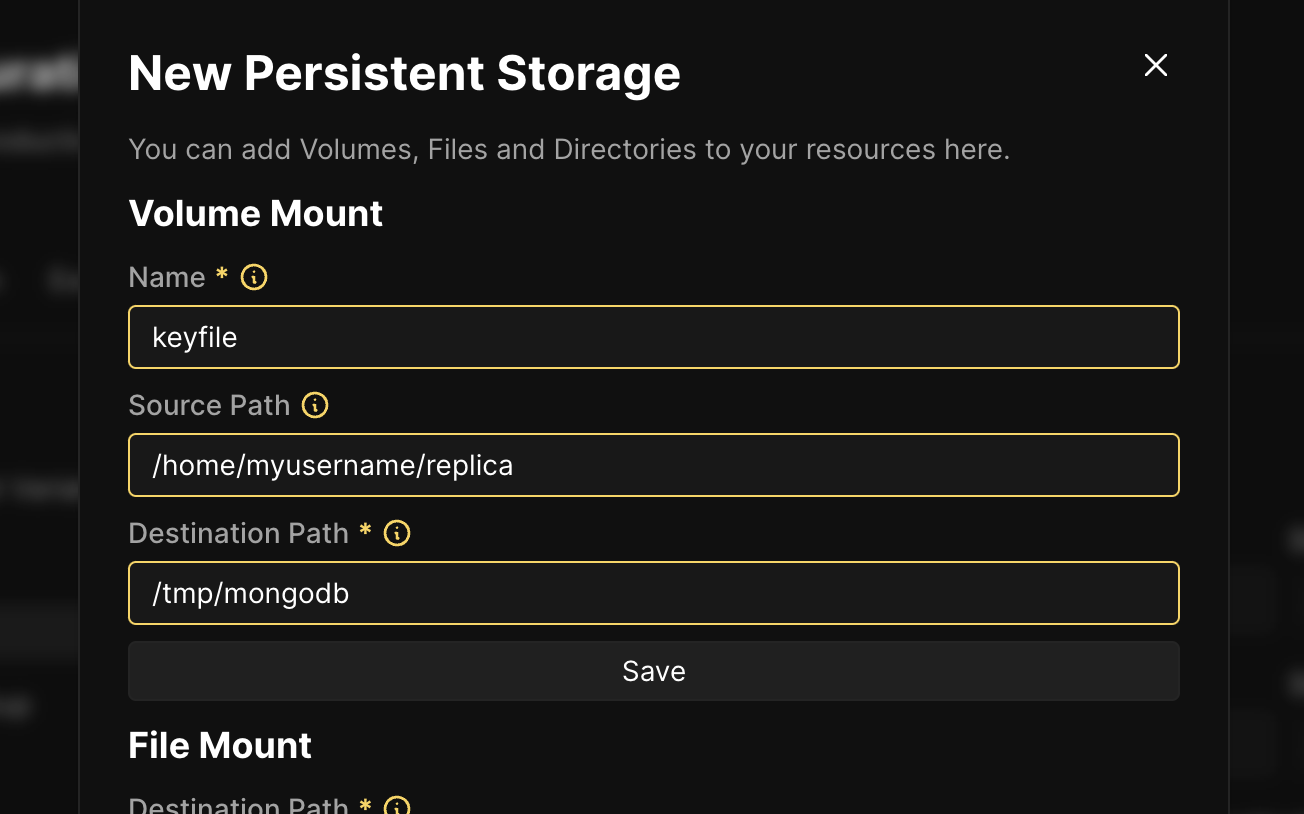
This step ensures that the key file is accessible to all instances when started.
You can now start each database by clicking the Start button on the configuration page.
Initialize the Replica Set
Connect to the first database instance (in our case repl-1). You can find the connection string on the database configuration page. Use the terminal with mongosh or a GUI like Compass, connect to the database, and run the following command:
rs.initiate({
  _id: "rs0",
  members: [
    { _id: 0, host: "<ip>:5432" },
    { _id: 1, host: "<ip>:5433" },
    { _id: 2, host: "<ip>:5434" },
  ],
});
Replace <ip> with the actual IP addresses of your instances (in our example, it’s 123.123.123.123). This command initializes the replica set with the three members.
Connect to the Replica Set
In Compass or your application, use the following connection string to connect to your MongoDB replica set:
mongodb://<username>:<password>@<ip>:5432,<ip>:5433,<ip>:5434/?replicaSet=rs0Use the <username> and <password> from the connection string of the primary database (in our case repl-1), and replace <ip> with the server IP address.
Conclusion
You have now successfully set up a basic configuration of a MongoDB replica set using Coolify. This configuration provides better data availability and fault tolerance for your application and can be improved with additional configurations depending on your needs. Remember to monitor your replica set and perform regular maintenance to ensure optimal performance.
Notes
Feel free to save or share this article. If you notice a mistake or want to contribute to a revision of the article, contact me at info@antoniogioia.com.
Cover image generated with DALL·E


